Forms and Processes
Let's take a closer look at how a form can be embedded in a task item. In Rapid Business, the Assets module allows us to track our company's assets and create Service Logs for these assets.
When a Service Log is created, that Rapid system creates a task to remind the user to fill out the service log a week before the service is due. When this task is automatically created by Rapid, it will contain an embedded form as seen below:
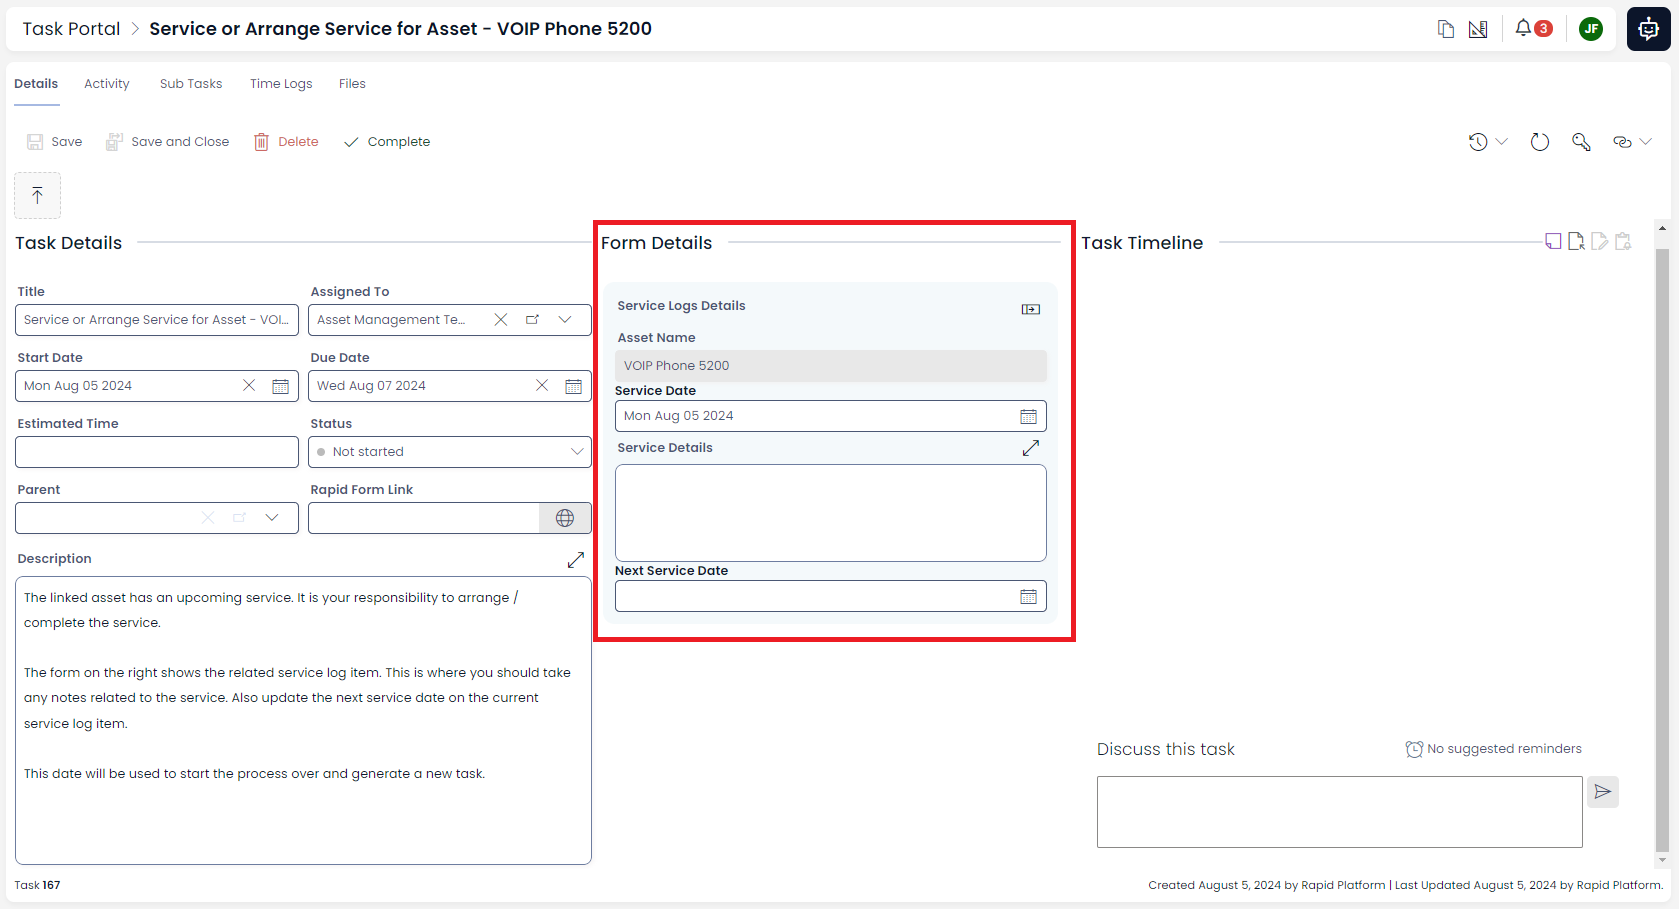
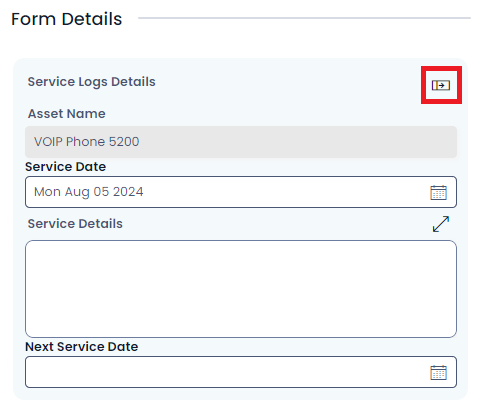
If we zoom in to look at the form, we can see that it is a simple web form that allows us to edit the details of the service item directly (without having to find the specific Service Log, because it is already linked to the task for us).
Note that the embedded form contains a "go to" button, which is indicated with a red box. This button will take you directly to the item page of the Service Log. However, we can edit all the relevant fields here in this form, and save the task to commit our changes to the Service Log item.
Workflow Processes
You might be wondering how this automatic task was generated. You may recall at the start of this series we mentioned there are two other experiences: Designer and Workflow.
Using Workflow, we can design automated jobs, such as creating tasks for users. When an automated task is performed, it is called a process run.
If we click on the link icon in the upper-right of an item's page, we can see any tasks, items, or process runs that are linked to the current item we are viewing.
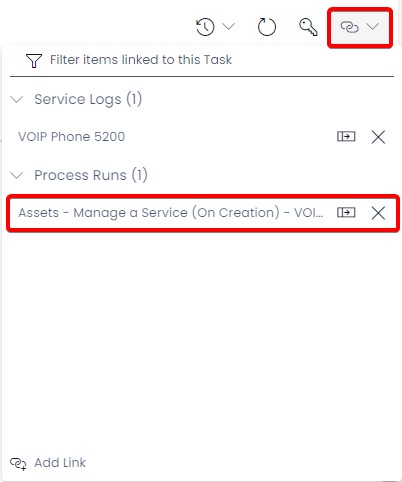
If we click the "go to" button next to "Assets - Manage a Service", we can see the Workflow diagram that created this task.
While it is beyond the scope of this training course to go through how workflow operates (we will examine it more closely in a future training course), it is worthwhile understanding that all the process runs Rapid creates can be understood and examined.
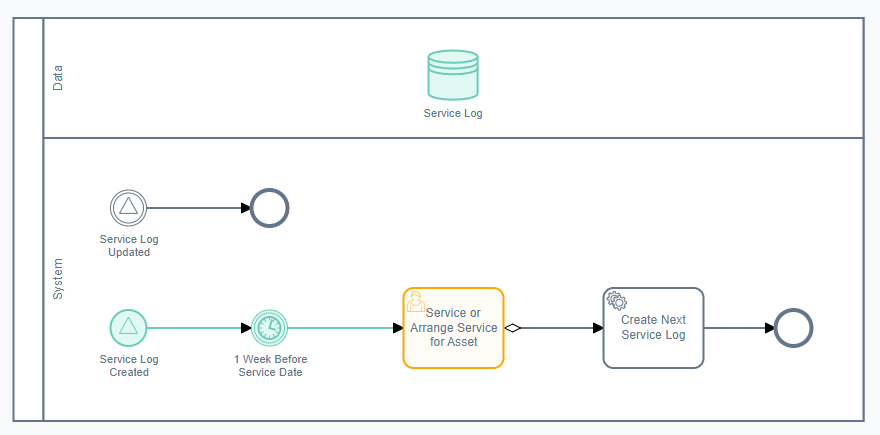
Looking at the example above, we read the diagram from left-to-right. Elements that are Green have been completed successfully. Yellow elements are currently in progress. Red elements have failed. White elements have not been run.
Understanding the Workflow Diagram
-
So, we can see that a "Service Log Created" was triggered (because it is green).

-
Then, we have a timer that waited until "1 week before the service date".

-
Now, a task has been created for a user (because it has a person in the upper-left corner). This is the task that currently exists in our tasks list.

-
We can see after we complete the current Asset Service Log task, a new service log will be created (and thus the workflow will trigger again, and wait a week before the service to remind us). This item is white, and so it has not been triggered yet. It is waiting for the previous task to be completed.

-
Then, the workflow will terminate and end.

There are other elements on the workflow diagram, but for now it is enough for us to understand that this Workflow creates tasks and items in our site for us.
Further Reading
- If you are interesting in learning more about workflow, you can visit our User Manual to read a brief introduction on Workflow, and then be directed to other manuals where you can learn about the elements how how to create your own workflows.